Self leveling concrete - cracks and deboned areas

Flooring Forum - DIY & Professional

Help Support Flooring Forum - DIY & Professional:

This site may earn a commission from merchant affiliate links, including eBay, Amazon, and others.

Engr23x

New Member
Joined
Jan 26, 2023
Messages
3
Location
Detroit
Hey all,

Hoping for some advice on some issues we are having with self leveling concrete that was poured by our basement contractors last week. SLC was poured on floor surface after the old 9x9 asbestos tile had been removed by an abatement company. The old tile adhesive was still on the floor, and the abatement company applied a sealer to that several months ago now.

Our contractor applied primer prior to pouring the SLC, however they only sent 1 guys to pour the whole basement by himself (about 950 sq feet in multiple rooms).

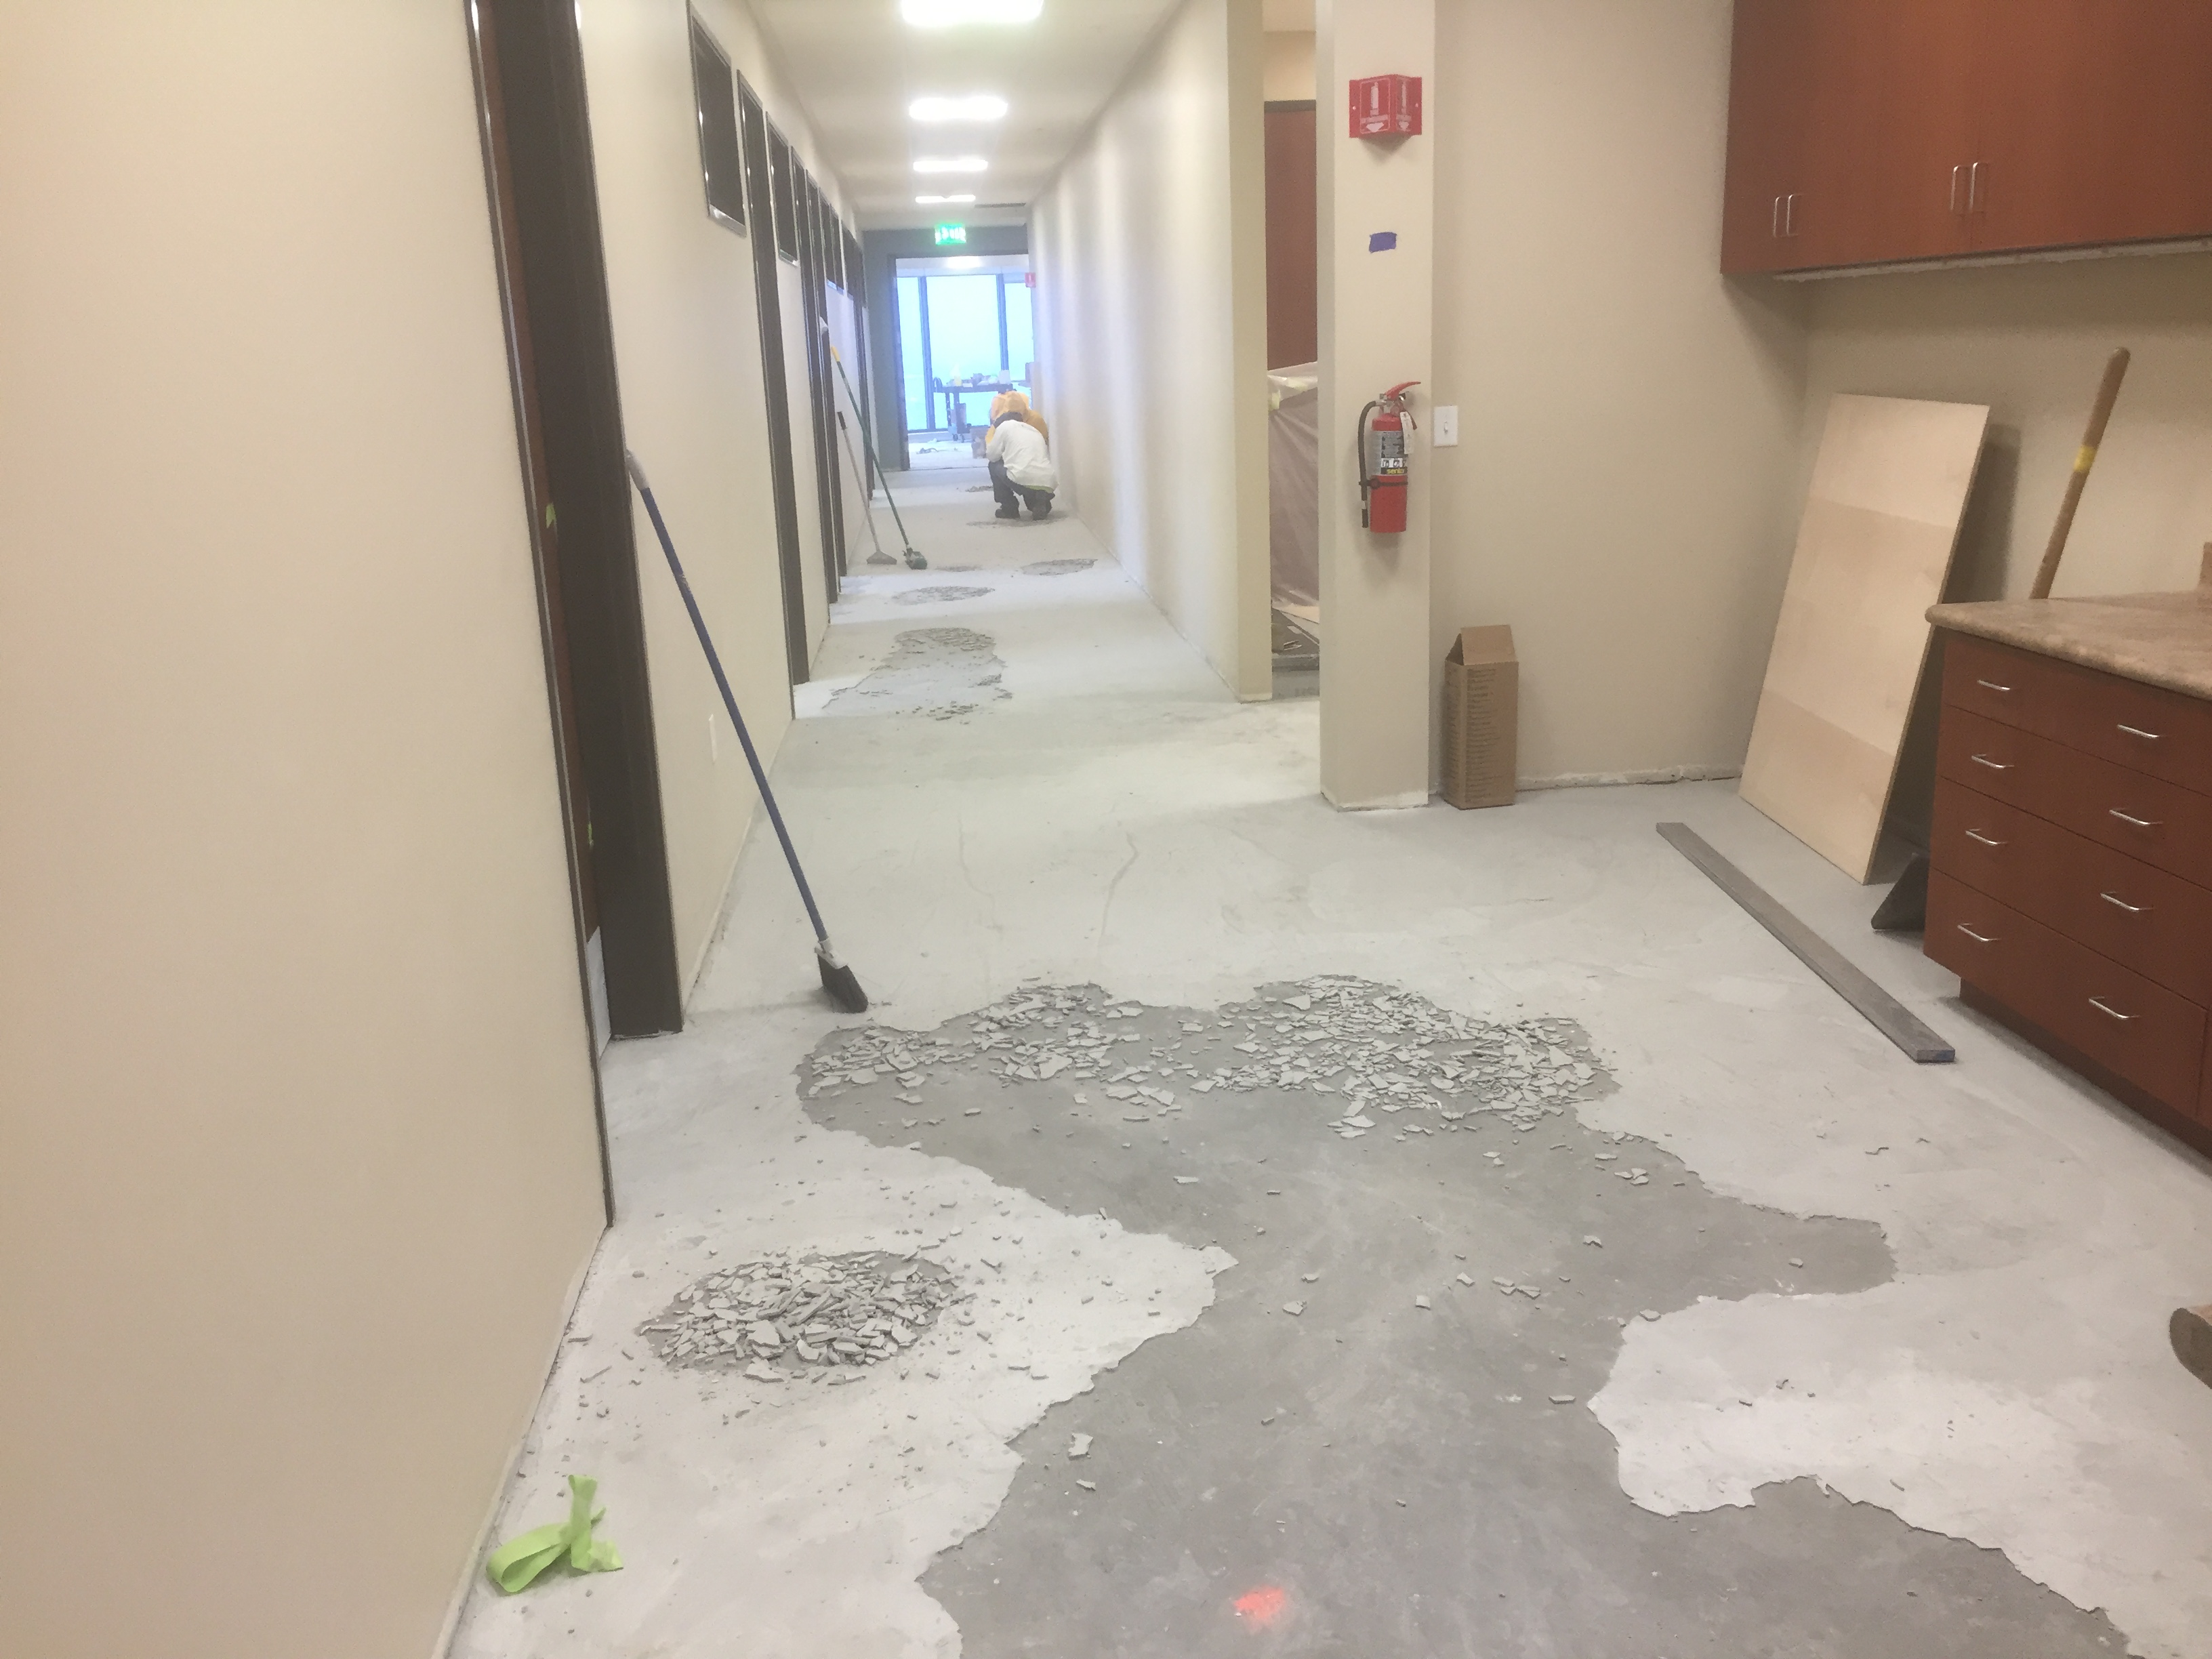
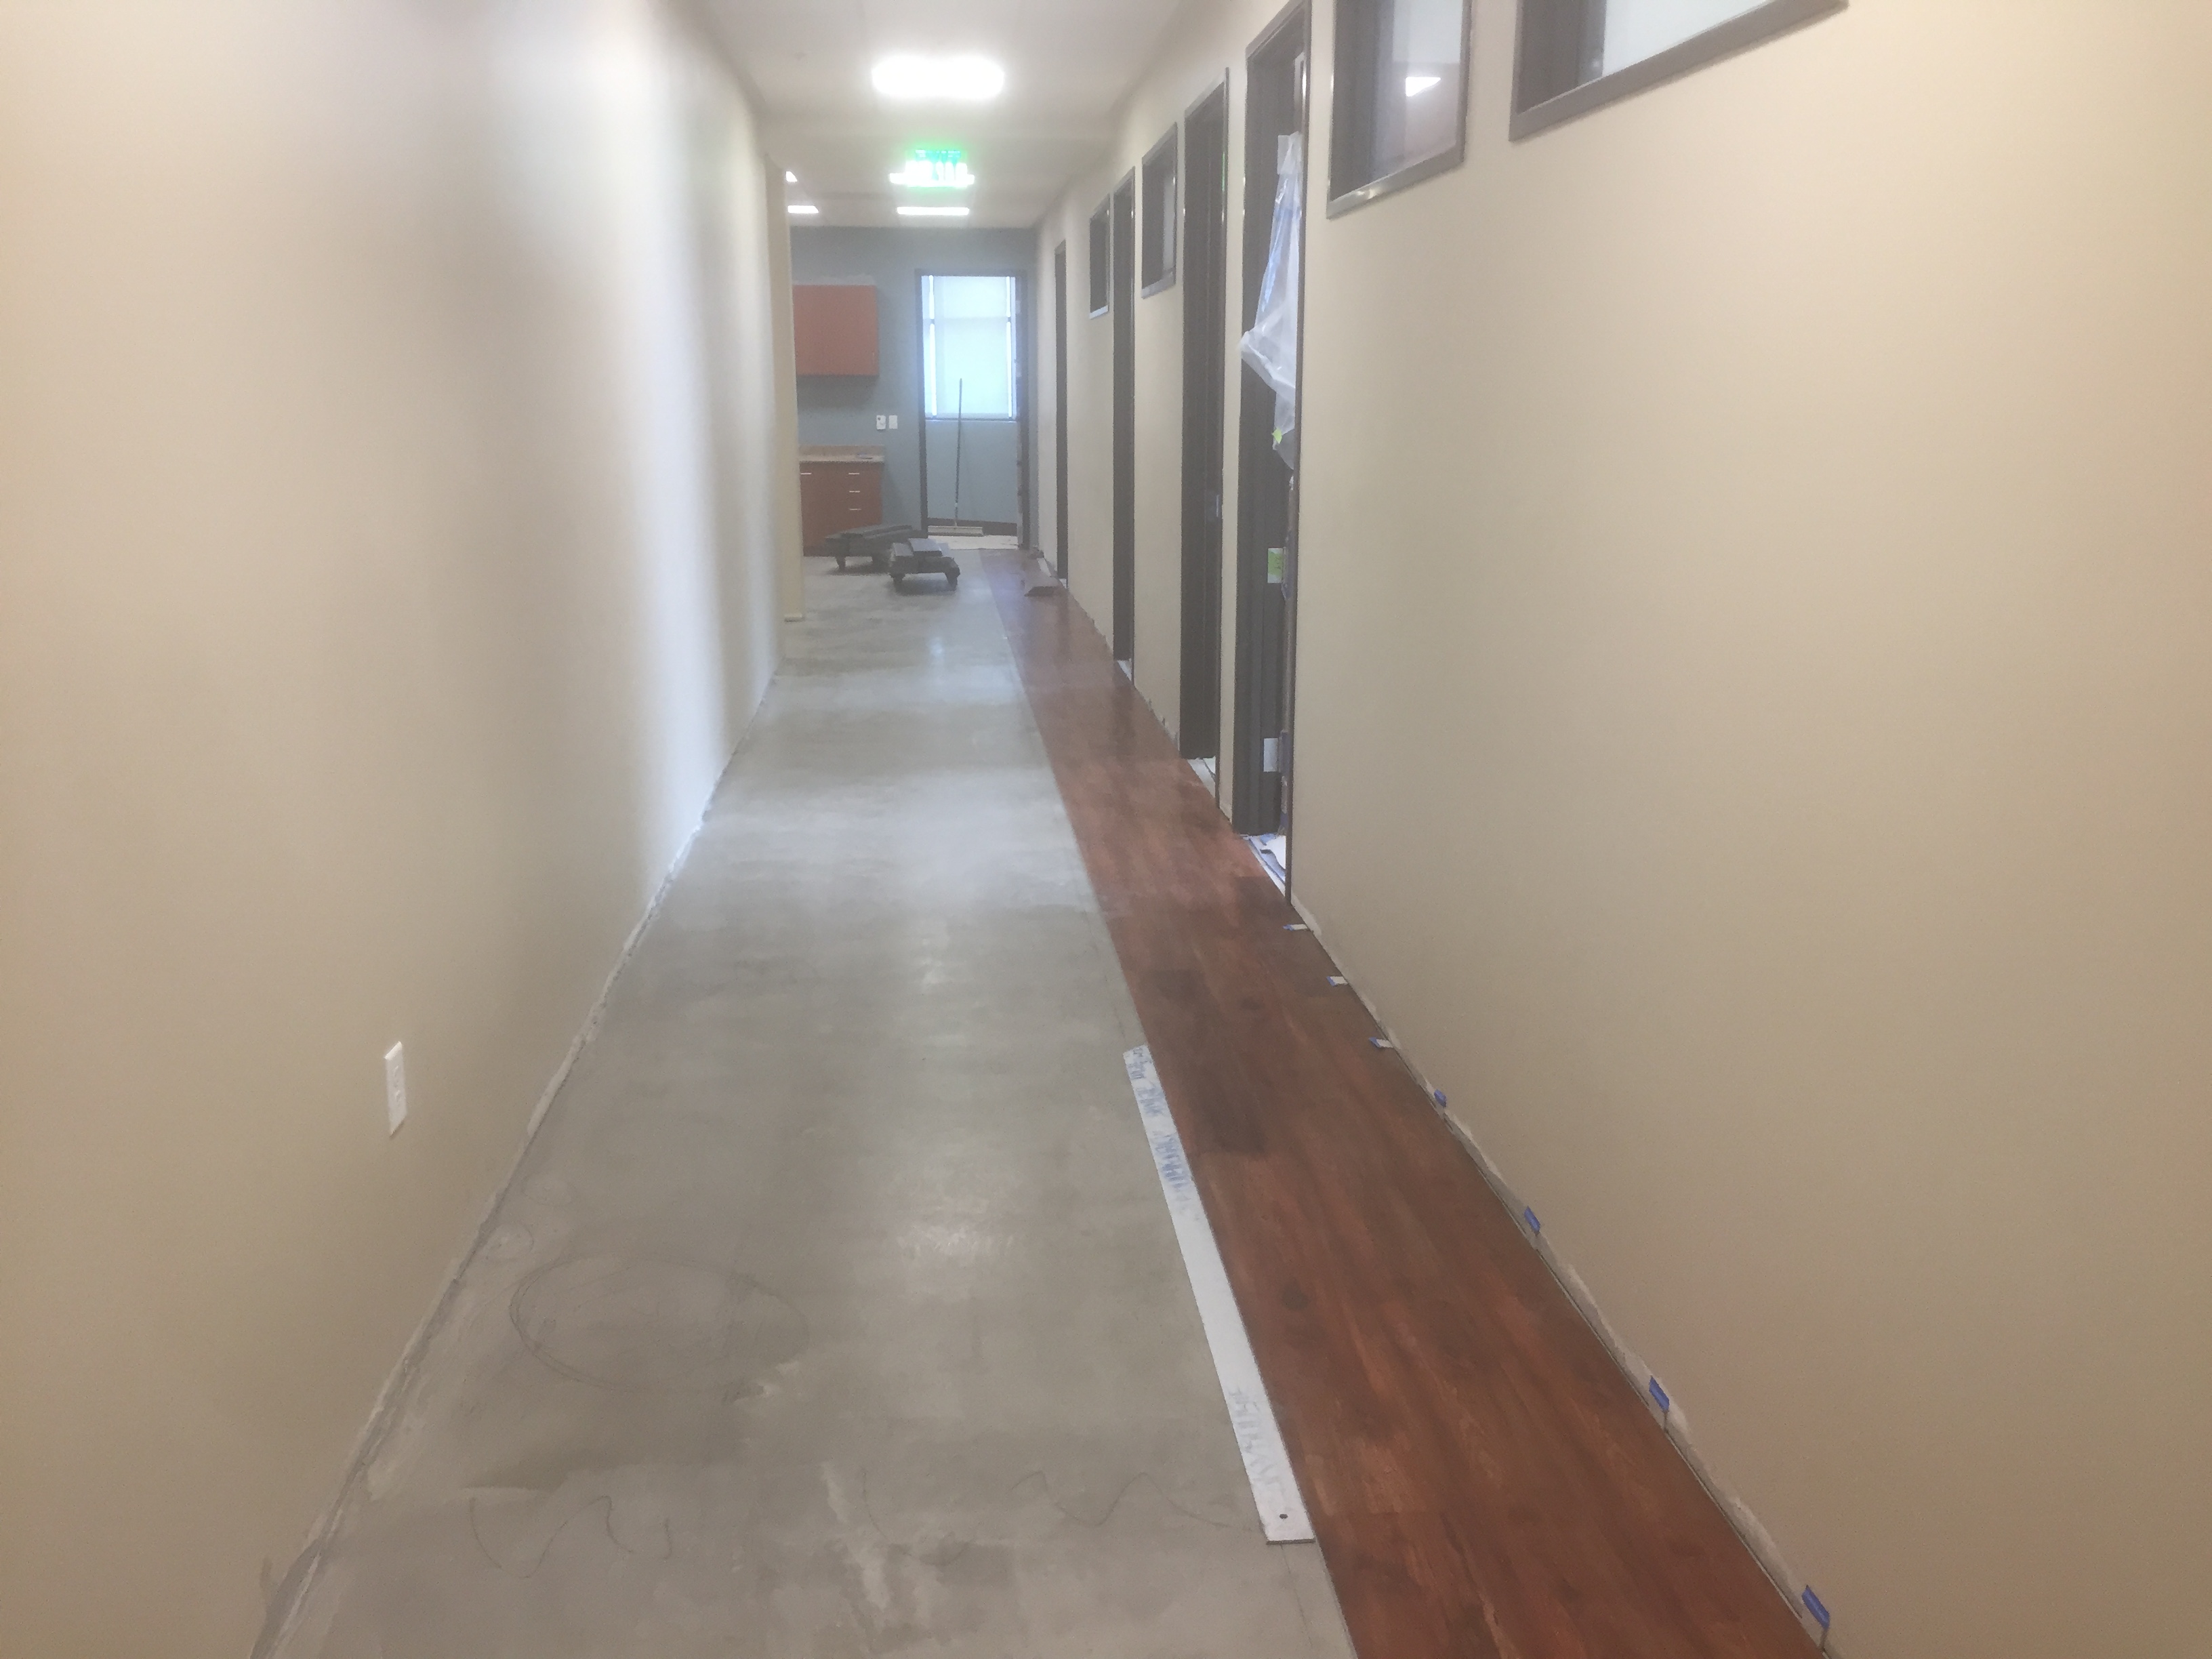
I media felt after pouring the surface had lots of white streaking and inconsistent coloration. Now after a week there are multiple areas with surface cracking developing, as well as hollow sounding areas where the SLC bonding has failed (checked by dropping a golf ball around the floor)

From what I read they guy likely over watered the mix since there was so much white swirl on top right at pouring.

Is it acceptable to just chisel out the hollow spots and repour in those areas (what contractor will probably want to do)? Or is the proper fix to take all of the SLC out and repour from scratch?

They also fully tiled the bathroom already over the SLC, and I’m now worried there could be issues with the Tile in there is the SLC is debonded (likely based on the rest of it) as well.

Any advice is appreciated

Thank you
D069976D-3024-4625-A3D0-BD8D81AE39C0.jpeg
077F3923-44FA-42D9-A7AC-B628485DB595.jpeg
A12319B1-8233-46E8-86BE-FA6893CF0F6B.jpeg
 
Did it cure hard almost like concrete? Or is it kinda soft and chalky? A little over watering won’t kill you, a lot will. The correct ratio is kinda important. I always measure out the water.

As for the hollow sounds and cracks, could be it didn’t bond properly due to over watering, or it wasn’t properly primed or reacted with the old adhesive/sealer. Was the old adhesive black? Or could be moisture problems with the old concrete. Could be the pour was too thick. Different compounds are rated for different thicknesses. Or maybe just crappy quality compound. Either way I wouldn’t be too happy with that… Spot fixing might work…Might not. I wouldn’t lay the new floor right away. Give it a few weeks after the repair and see what happens.
 
Last edited:
Did it cure hard almost like concrete? Or is it kinda soft and chalky? A little over watering won’t kill you, a lot will. The correct ratio is kinda important. I always measure out the water.

As for the hollow sounds and cracks, could be it didn’t bond properly due to over watering, or it wasn’t properly primed or reacted with the old adhesive/sealer. Was the old adhesive black? Or could be moisture problems with the old concrete. Could be the pour was too thick. Different compounds are rated for different thicknesses. Or maybe just crappy quality compound. Either way I wouldn’t be too happy with that… Spot fixing might work…Might not. I wouldn’t lay the new floor right away. Give it a few weeks after the repair and see what happens.
Thank you, yeah old adhesive from the tile was black - they also did dry wall before they poured the SLC and they didn’t do a very good job of cleaning the dust up.

SLC itself set hard in some spots, and in others is chalky/powdery to the point of looking like dry mud. In any area I can scratch off the top layer with my fingernail
 
You’ve got a lot of variables there. Why did they opt to pour self leveler on the entire floor? Was the concrete in poor condition? Did anyone do a moisture check on the basement floor? We’re the old 9” tiles well adhered? What kind of sealer did the abatement company use? Did they at least scrape up what they could of the old cut back adhesive? Gypsum dust is never a good thing for any Portland based product to adhere to. Based on the fact that different areas are different degrees of hardness it’s fair to assume they didn’t measure out the water. Also sending one man for a 1000 sq. ft. Job, although it can be done, is a little short handed. I hate to put down other people’s work but it sounds like they breezed over a lot of the basic concerns of this type of project.

If you paid good money to have this done I would not accept a soft, powdery, mud like floor that isn’t adhered to the floor below.
 
Last edited:
Appreciate the input - I spoke with the company today and they are evaluating and determining their proposed corrective actions, likely will be complete removal and re-pour it sounds like. I’m also working with a third party concrete company to come in and do a detail assessment after this thread discussion to ensure this gets corrected properly. Appreciate the help!
 
My two cents-----I'd really want to bounce that ball around or otherwise tap and MARK any and all hollow spots. For different flooring types there are more and less critical aspects to a prep job.

Of course JP is asking all the normal questions I would online.

1. You dont say specifically what the new flooring (if any) will be.
2. Hairline cracks aren't disastrous for many types of flooring
3. "encapsulation" creates incompatibility with primer/SLC (bond)
4. properly mixed SLC is a consistent color-----more or less
5. I would without a doubt HIT the SLC everywhere I hear it's hollow.
6. Anything that pops loose without serious bashing OUGHT to be removed and repaired. Any pro would know what I mean.
7. It CAN be spot patched if anywhere close to 90%+ is well bonded and acceptable-------really depends on the type of flooring

Here's some photos from an SLC failure of a General Contractor at a Water Treatment Facility Office in Lancaster, CA---new const.
 

Attachments

  • IMG_2780.JPG
    IMG_2780.JPG
    1.7 MB · Views: 0
  • IMG_2755.JPG
    IMG_2755.JPG
    1.7 MB · Views: 0
  • IMG_2775.JPG
    IMG_2775.JPG
    1.3 MB · Views: 0
  • IMG_2778.JPG
    IMG_2778.JPG
    1.4 MB · Views: 0
  • IMG_2863.JPG
    IMG_2863.JPG
    1.2 MB · Views: 0
You said the abatement company applied sealer, then the company installing this SLC also applied primer?
What "sealer" the abatement company use.
Is the sealer compatible with the primer?
I might be wrong but I'm thinking that I would skim coat the entire surface of the black adhesive with something like ardex, and then seal it with a primer and then pour an SLC.
It would have been worth it for the abatement company and the installer to talk about the products they were using and then discuss this with the SLC company of choice.
Chemicals is chemicals. Not all are remotely the same.
You put grease on your wheel bearings and it's just a thick, sticky nasty paste. You also put grease in the rear differential of your car or pickup. Differential grease pours out of a container. Both are grease, but you sure wouldn't want to switch em.
What I'm saying is, if one party put down some sealer product and the other party put a "primer" product on top of sealer....... What would you expect to happen?
I have no clue because I'm not a chemist and neither is the person that applied the primer or the person that applied the sealer.
I'm thinking they both simply "did stuff"
If the guy installing the SLC wasn't informed that a sealer was applied, that might be an issue. If I was him, I would have called a rep for the company that I want to use and describe in detail the circumstances and situations on this job.
Let him make the call.
 
Last edited:
I'm a little late to the party, but I thought I'd add some observations...

The product has been mixed incorrectly. Too much water. When this happens, all of the additives (the stuff that allows the product to be flexible and not crack) wash to the surface and you see what we often call "powdering". That's what all of that white stuff is.

This will cause two major problems. One, the cracking that you are already seeing. Two, if you were to adhere something to the surface, it would not bond properly. I would bet that if you were to pH test this as it sits, the pH would be pretty high.

That white stuff is actually latex or acrylic in a dry powder form. Sometimes, depending on the product, you may also see fibers in it. Some self-leveling can contain Kevlar fibers for reinforcing the product against movement. It kind of works like a teeny tiny version of rebar to provide dimensional stability.

Self-leveling is not like thin set mortar or really even trowelled patches. It has a very specific ratio of water to powder. If you get outside of that, either way, you severely affect the performance of the product. You cannot mix it to "feel".

It also has a very specific amount of time that you should mix the product. It then needs to set for a set amount of time to slake off. This allows any entrained air that's trapped in the mix to rise to the top and escape so that you don't have a lot of "fish eyes" (bubbles) in the mix that leave little pock marks in the finished surface.

When done correctly, it's like coordinating a symphony. Complicated but almost artistic and beautiful.

It's definitely a defective pour. It needs to come out and be replaced.

Whatever you do, DO NOT LET THEM POUR OVER THIS!!! It will be an absolute nightmare. It needs to be removed, re-primed, and repoured correctly.

If the product is not being run through a pump, then a typical self-leveling crew should really be 3 people minimum. 1 guy mixing, 1 guy controlling the product on the floor, and 1 guy prepping bags for the mixer and taking the mixed material and dumping it out. You can do it with 2 people if they know what they're doing but it can get pretty hairy if you run into a problem. You only have so much time, generally around 10-12 minutes to get the next mixed material down so that you are working with wet edge to wet edge. The exception to this is if you are using a type of self-leveling that is reactivatible. If that's the case, then you can use a set of self-leveling star rollers and reactivate the product. This returns it back to a more flowable state and then you can re-blend your wet edges if you started to "lose' the pour. The rollers break down the early bonding legs that start to form in the product and allow it to flow again. You can do this reactivation once and then that's it. It gives you about another 8-10 minutes of time to work with that wet edge.

I'm sorry that you had this experience. Please know there are many good quality mechanics in our industry who do good work and would never leave somebody in this situation. I wish you well getting it replaced and hopefully this time everything is done correctly and the job goes smoothly (no pun intended). :) ;)
 
Last edited:
That’s interesting. I’ve never heard of reactivating the pour. I could see where that would come in handy.

Aside from a specific amount of mixing time you also want to watch your RPM on the mixer. Too fast is no good.

When we were pouring by hand in large areas we would build “dams” using spray foam (Great Stuff) to break it down into more manageable sized areas. It would give you time to regroup, take lunch, or even come back the next day. Knock the foam out after the compound sets up and you have a nice edge at the proper height to pour up to… Not sure if that was by the book but it worked well.
 
Last edited:
I've not tried spray foam but sounds like it would work pretty well. We used foam tape. We had it in various thicknesses.

Yeah, you don't want to use a hammer drill. You want to use a low-speed mixer. Otherwise, you end up whipping a lot of air into the mix and it messes things up.

You also got to check and plug any place that stuff could run into.

Had a customer doing a pour in an auto museum on the second floor. Missed a real small hole in the sub floor. Turned out it went all the way through. They noticed a dip forming where they missed this hole. Ran downstairs and the SL was dripping from the ceiling and missing a Cord (probably a $2+ million car) by about 12". They quickly got that stopped!

Yeah, the reactivation feature is nice. There are several out on the market. The one we handle is Ardex K-10. It works really well for pours up to 1/2" and it's a lot less expensive than other SL.

They actually have this feature in some thinset mortars as well. If the mortar starts to firm up, you can remix it and it will give you another 20-30 minutes of potlife. The key is NOT adding more water, just remixing. It breaks the legs that started to form and re-emulsifies the mix. The technologies they have out today are pretty cool.
 
Wow, that's some really neat info.
The first time I used the self level was I believe K15? Many many years ago. It seemed like the mix was too thick and I added another cup of water or so. It was just one bag and I was doing this by myself.
This was in a basement laundry room and the floor was to be covered with Pergo... Pergo original with the green paperbacking.
Anyway the customer had sealed off a floor drain and there was an oval depression to level out, maybe 3 ft or 4 ft by 6 ft.
I poured the mix and it seemed to level out fine so I was comfortable with that but when I came back an hour and a half later to see how it was doing, the center of the pour had a microscopically thin, shiny area in the center, the deepest part.
I think that was my cup of water.
Customer and the shop were anxious to get going on this project, but it bothered me so much I waited a week before I covered over it because I felt so strongly the water needed to evaporate from it.
 
Last edited:
K-15 is kind of Ardex's "workhorse" SL. You can do pours clear up to 5" deep with it. It can be smoothed down to about an 1/8" lip and that's about as thin as you'll get it due to its viscosity. It's still around and we still sell a lot of it, but they've started to bring some newer products out that are cheaper such as the K-10. K-10 is about 1/2 the price / bag as K-15 with the same coverage / bag at up to 1/2" deep. Most people are doing thinner applications so they don't need all the flexibility that K-15 has built into it (that's why it's more expensive to be honest, the more goodies in the mix the more expensive it gets).

It'll vary a little bit with temperature, humidity, and airflow in the space, but K-15 is going to be walkable in about 3-4 hours and you can install resilient over it in as little as 16-18 hours. That's another reason K-15 is more expensive is that it's able to get the job done quicker due to the chemistry. We also have cheaper SL (Ardex V-1200 for example) that can go as thick as K-15. It'll be walkable in about the same amount of time, but you're going to have to give it 3 days to "cure" before you install the floor. If time is not an issue on the job, then it can save a whole lot of money.

They have products for high-flow (using a pump), they have products for wood substrates (K-22F), products for going over old adhesive residual (not a fan of doing that but not my call), products for leveling under ceramic/porcelain (Liquid Backer Board). Every one of them works a bit differently and are really tailored to work for a certain situation.

Mapei, Schonox, Laticrete, & Uzin all do the same thing and have multiple SL products for different site and project conditions. I think with all of these quick lock floors needing to be installed over pretty flat (notice I didn't say level ;)) substrates, the average residential installer is going to be forced to use SL more and more as we move forward. I've seen more situations like this OP has posted in the last year than I can count because they just aren't used to dealing with it. It's not rocket science, but it does require a different set of skills and tools than trowelling a floor with patch. Ardex and Mapei both run great training schools for free at their sites. All you have to do is sign up and get there. I've been through Ardex school multiple times while taking my customers out there for training and I never fail to learn something new every time.
 
I've seen more situations like this OP has posted in the last year than I can count because they just aren't used to dealing with it. It's not rocket science, but it does require a different set of skills and tools than trowelling a floor with patch.
A lot of valuable information indeed! Thanks for sharing…

But in a situation like the OP has I can’t help but wonder if a little bit of regular under underlayment compound along with a skilled troweling and a screed, couldn’t have done just as good a job for a lot less money… Not all floors in a residential setting are in requirement of leveling…😎
 
Yeah, it's hard to say without seeing the shape the original subfloor was in. I'm wondering if there isn't an old drain underneath that offset room with the block wall. Maybe they felt they had to pour the rest of the floor so it would meet up at the same level in the doorway or something. It's definitely a head scratcher.

We have several dealers who have continued to get burned because their crews did just that. Thought they had it "flat enough" using a trowel only to have to come back and eat the replacement because it proved to be not "flat enough". Given the state of the construction trade's continued shortage of trained and experienced help, concrete finishing quality is at an all-time low. Especially on residential new construction. We have multiple dealers who are switching over to self-leveling for new home basements because the concrete is so far out of flatness.

The new homes in our market here, it's pretty common to run into large basements that people are finishing to add additional living space. You start dealing with 1000+ sf of area and the floor is 1/2" out in spots and spending the amount of time grinding and raising areas with a trowleable patch and the labor gets pretty expensive. We just don't have enough guys like a @JPfloor or a @C.J. or a @highup that are experienced enough to do that size of an area and get it flat. The retailers can't fire the guys they got because they don't have anybody to replace them and, even worse, they don't have enough guys where they can have an experienced guy teach somebody. You also get that "builder" mentality where these guys are paid about like guys doing apartment work and they aren't going to do one iota extra to correct another trade's problems so they just do a hit and a lick and slam it in and on to the next one. I'm not trying to be the old guy yelling about the younger generation because it's really more about the retailer's have taken advantage of the installer's and kowtowed to these builders for so long that they've created their own mess. The whole worlds prices have been going up for going on three years but builders are still trying to figure out how to get it done cheaper. We have dealers in our market who are literally paying their guys $2.00 / sf max to install hardwood in new construction. They continue to push back whenever the guys refuse until they get somebody hungry enough to do it. It's the actual definition of insanity.

Sorry, I'll step off my soapbox. Suffice it to say we need more people to care about what they do, take some pride in their work, make it appealing to younger kids to get involved in the trades again and try and recapture some of the tremendous amount of knowledge we've lost in our industry, specifically in the installation side of our industry so that we don't have to look at these kinds of problems on a daily basis. I think we can do it, I just wish we could get more people on the same page and get them to understand that their store's best asset is their people. They just need to get their HOOA and pay them right, educate them, and take care of them. It's that simple.
 

Latest posts

Back
Top